Roles and Permissions
The Roles and Permissions feature allows administrators to define custom roles with granular permission control and assign them to users. This enables fine-grained access control across the Consentrix platform.
Prerequisites
Before you begin, ensure you have:
- An active Consentrix Account.
- Appropriate permissions to manage roles (see Required Permissions).
Required Permissions
| Permission Code | Access |
|---|---|
roles_permissions:view | View roles and permissions |
roles_permissions:create | Create new roles |
roles_permissions:edit | Edit roles and permissions |
roles_permissions:delete | Delete roles |
Key Features
| Feature | Description |
|---|---|
| Create Role | Define a new role with name, description, and permissions |
| View Role | View role details with permissions and assigned users |
| Edit Role | Modify role name, description, and permissions |
| Delete Role | Remove a role (automatically removes from all users) |
| Link Users | Assign a role to specific users |
| Unlink Users | Remove a role from specific users |
Permission Actions
Permissions in Consentrix are organized by actions that can be performed on resources:
| Action | Description |
|---|---|
VIEW | View resources |
CREATE | Create new resources |
EDIT | Modify existing resources |
DELETE | Remove resources |
REVIEW | Review resources |
APPROVE | Approve resources |
WITHDRAW | Withdraw resources |
EXPORT | Export resources |
Navigate to Roles and Permissions
- Log in to the Consentrix platform.
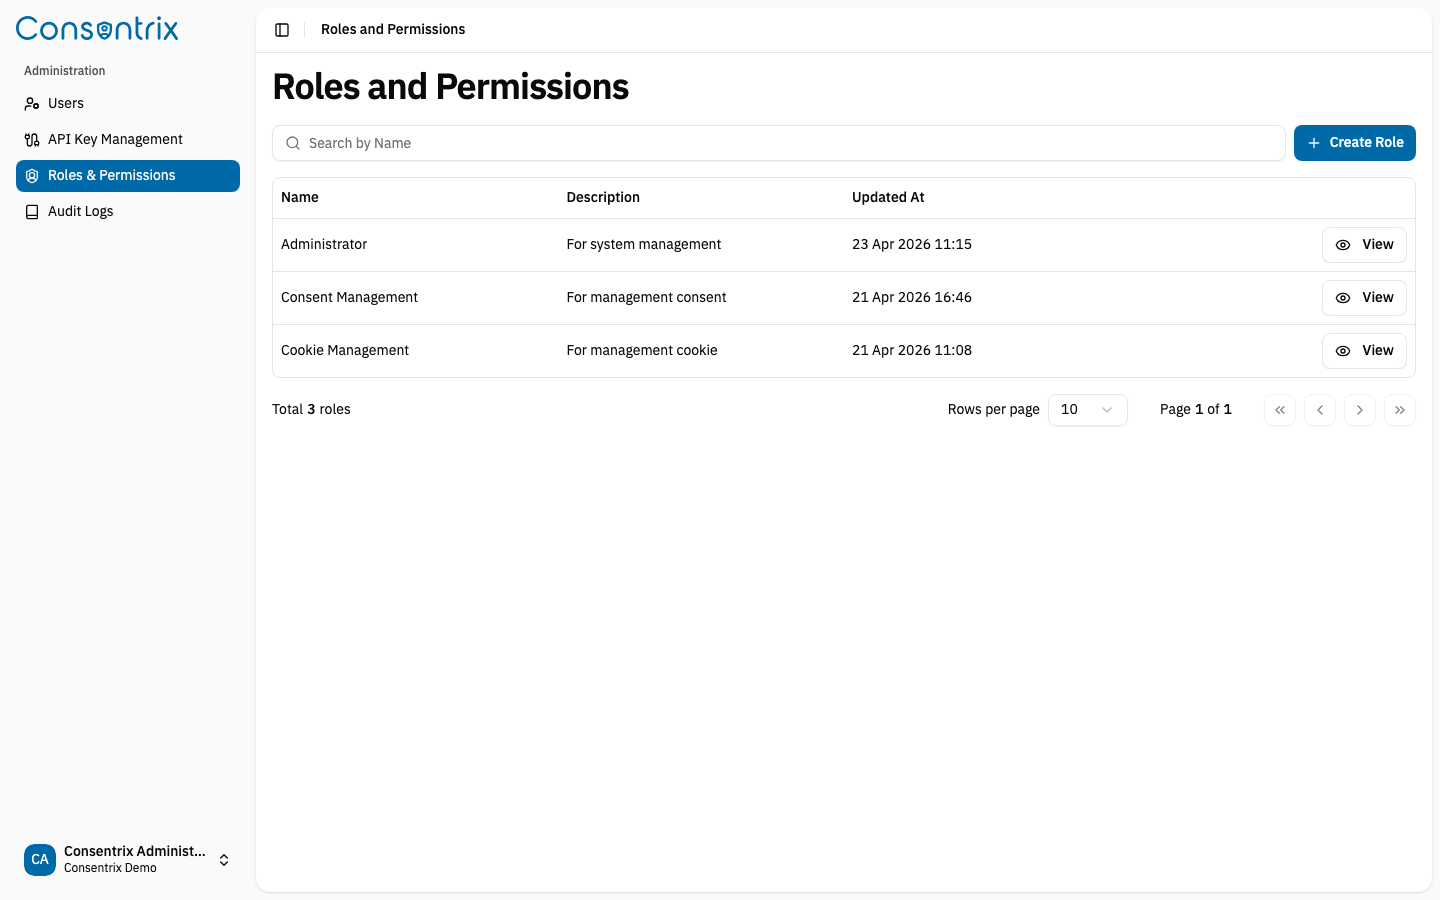
- Go to Administration > Roles and Permissions.
You will see a list of all existing roles with their names, descriptions, and last updated timestamps.
Create a New Role
Creating a role involves defining its name, description, and the permissions it grants.
Steps
- On the Roles and Permissions page, click Create Role.
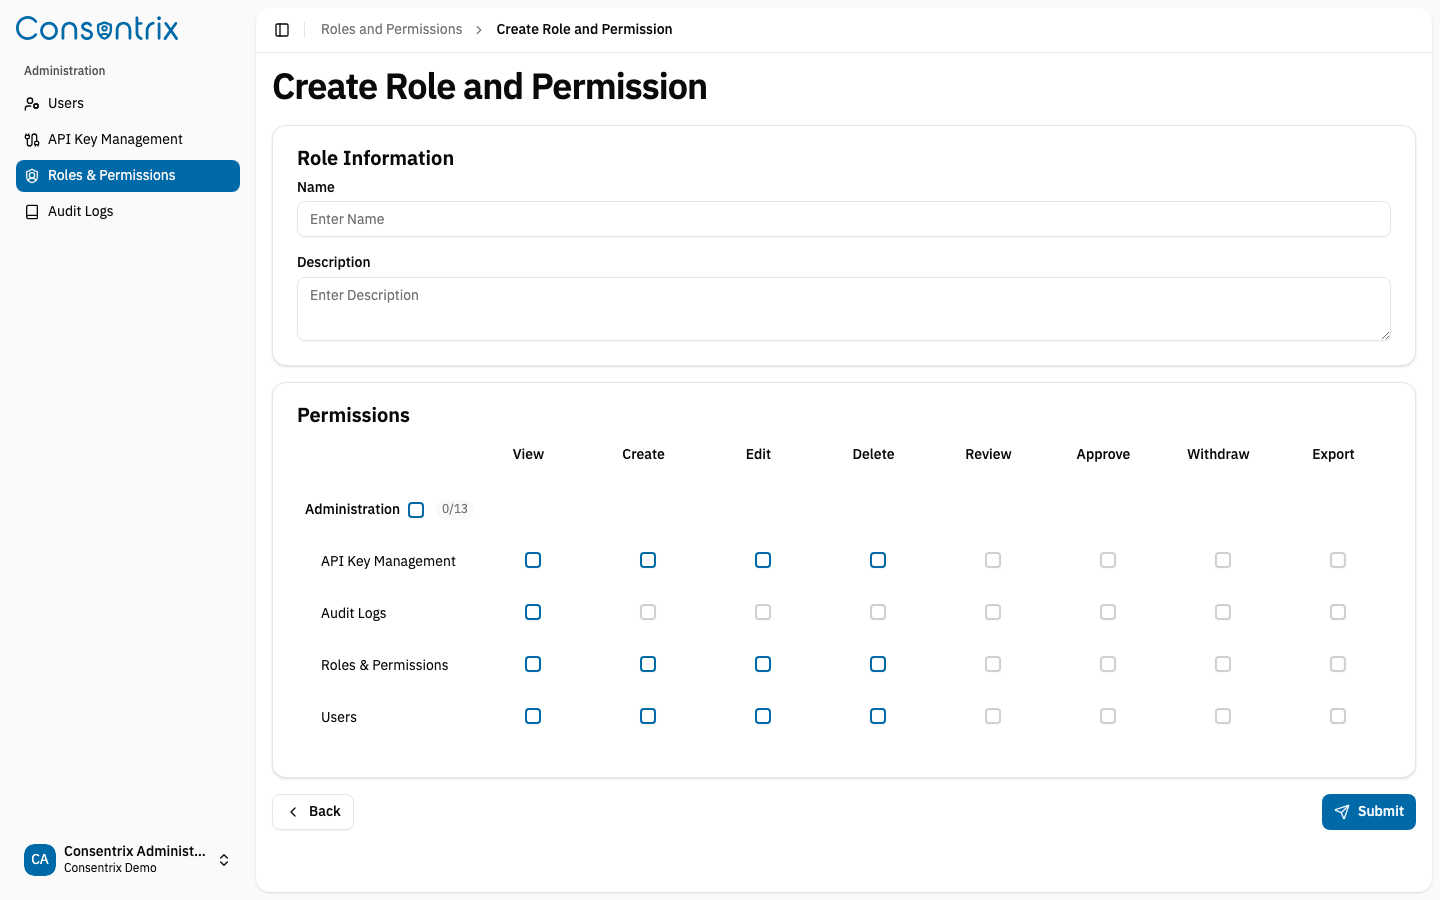
- On the Create Role and Permission page:
- Role Name: Enter a unique name for the role (e.g., "Customer Service", "Content Editor", "Read Only").
- Description: Enter a description explaining the role's purpose (optional but recommended).
- Permissions: Check the permissions you want to assign to this role.
- Click Submit.
- In the confirmation dialog, click Confirm.
- You will be redirected to the Role Detail page.
Selecting Permissions
The permissions are organized in a table by resource categories:
- Select All Category: Check the header checkbox to select all permissions in that category.
- Individual Permissions: Check specific permissions as needed.
- Permission Dependencies: Some permissions have dependencies. Selecting one permission may automatically select other required permissions.
Tip: Start with a minimal set of permissions and add more as needed. This follows the principle of least privilege.
View Role Details
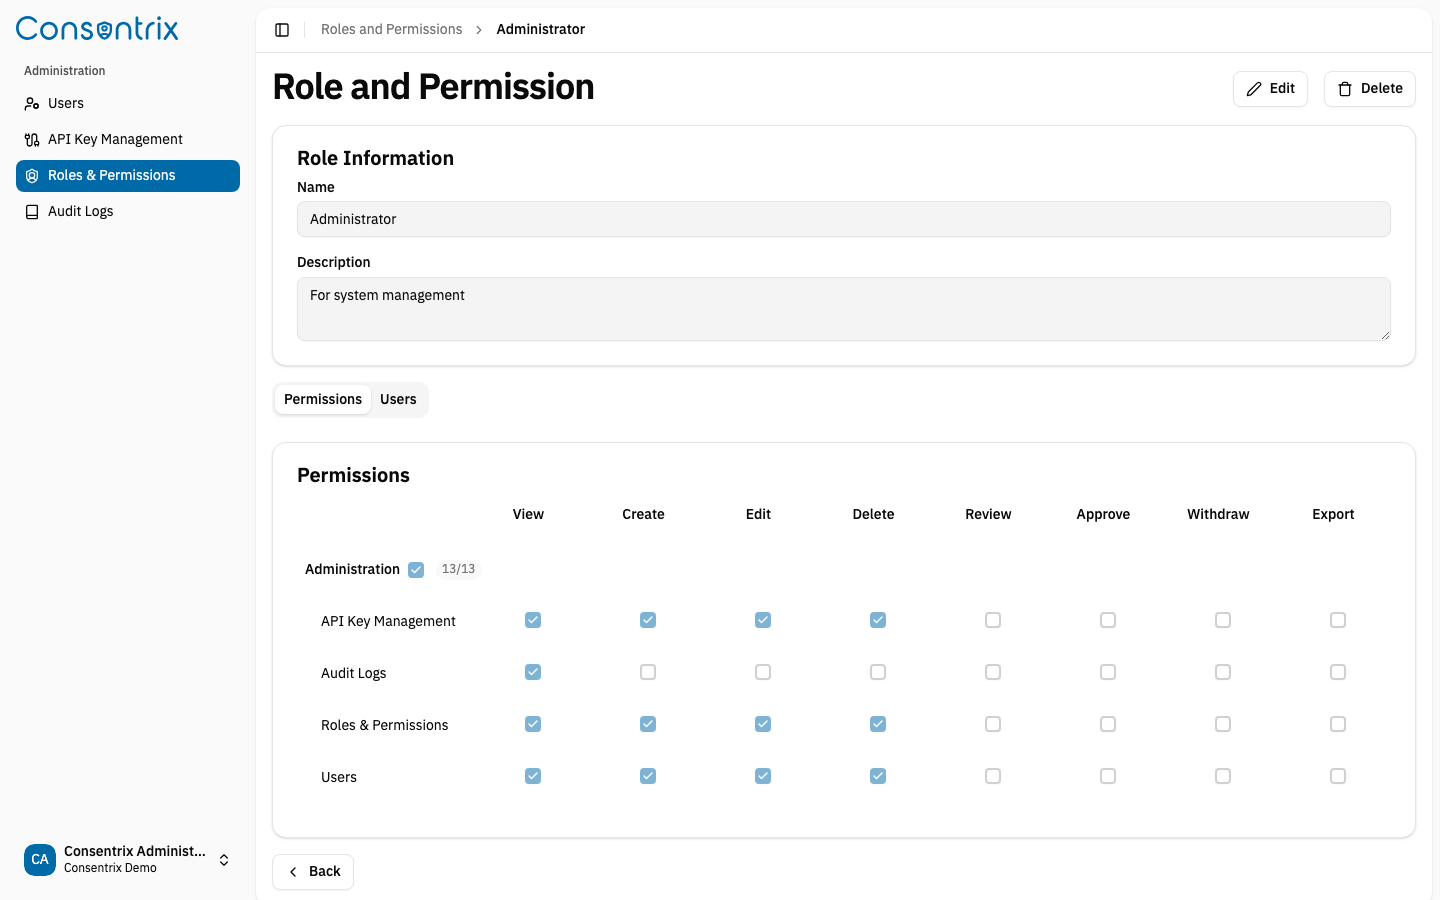
The Role Detail page provides a comprehensive view of a role with two tabs:
Permissions Tab
Shows a read-only list of all permissions assigned to this role, organized by resource categories.
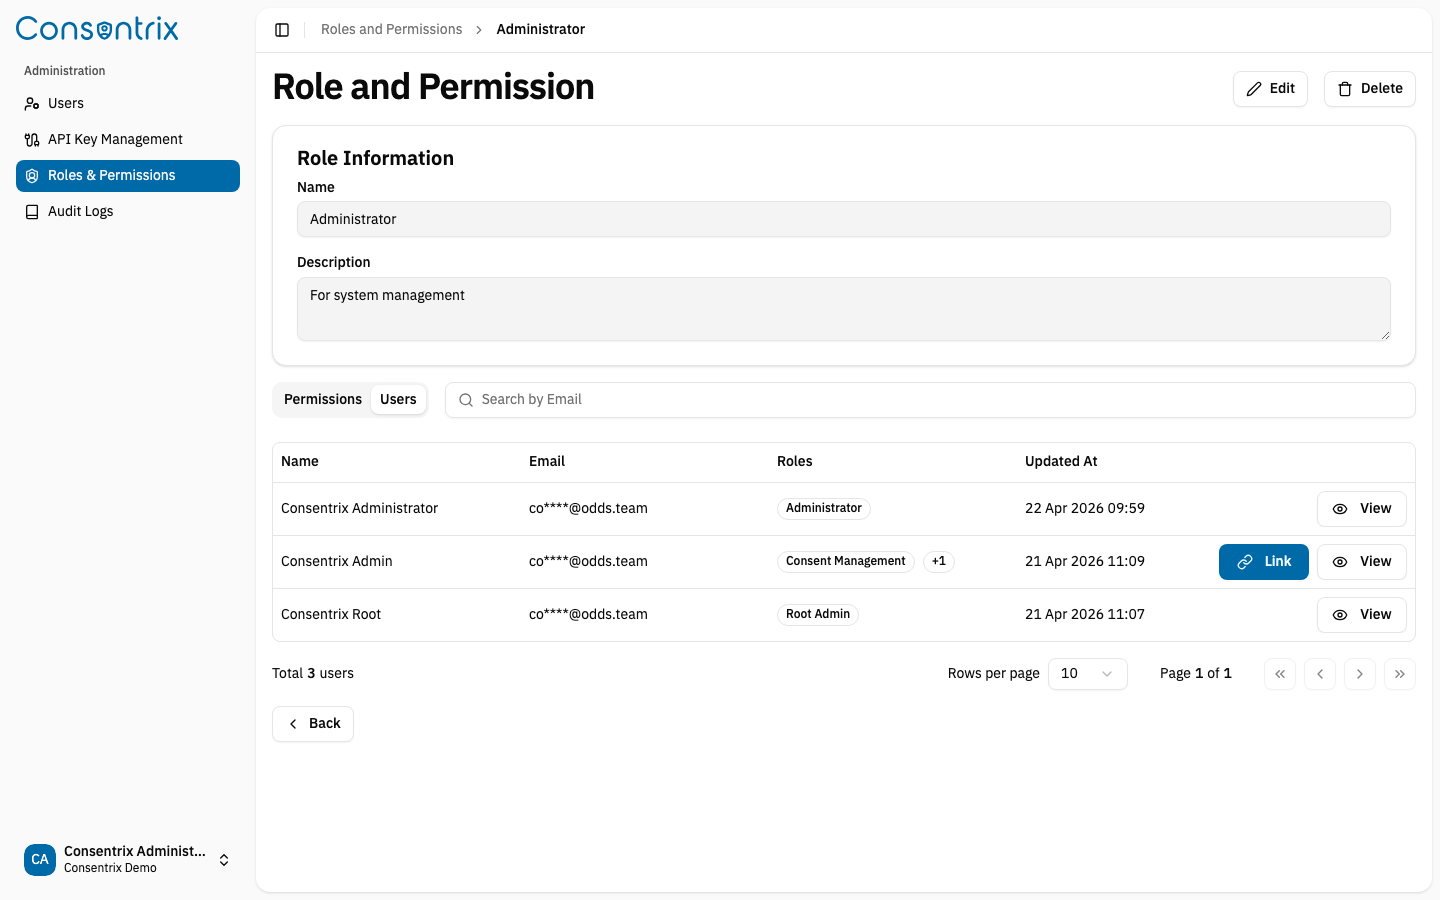
Users Tab
Shows all users who have this role assigned. This tab also allows you to link or unlink users:
| Feature | Description |
|---|---|
| Link User | Assign this role to a user |
| Unlink User | Remove this role from a user |
User Linking Protections
The system includes safety protections when managing user roles:
- Cannot unlink the last role from a user (every user must have at least one role).
- Cannot modify IAM users (users authenticated via Identity & Access Management).
- Cannot remove your own role (prevent self-lockout).
Edit a Role
You can modify a role's name, description, and permissions at any time.
Steps
- From the Roles and Permissions list, click View on the role you want to edit.
- On the Role Detail page, click Edit Role.
- On the Edit Role page:
- Modify the Role Name as needed.
- Modify the Description as needed.
- Check/uncheck Permissions to update the role's access.
- Click Save.
- Confirm the changes.
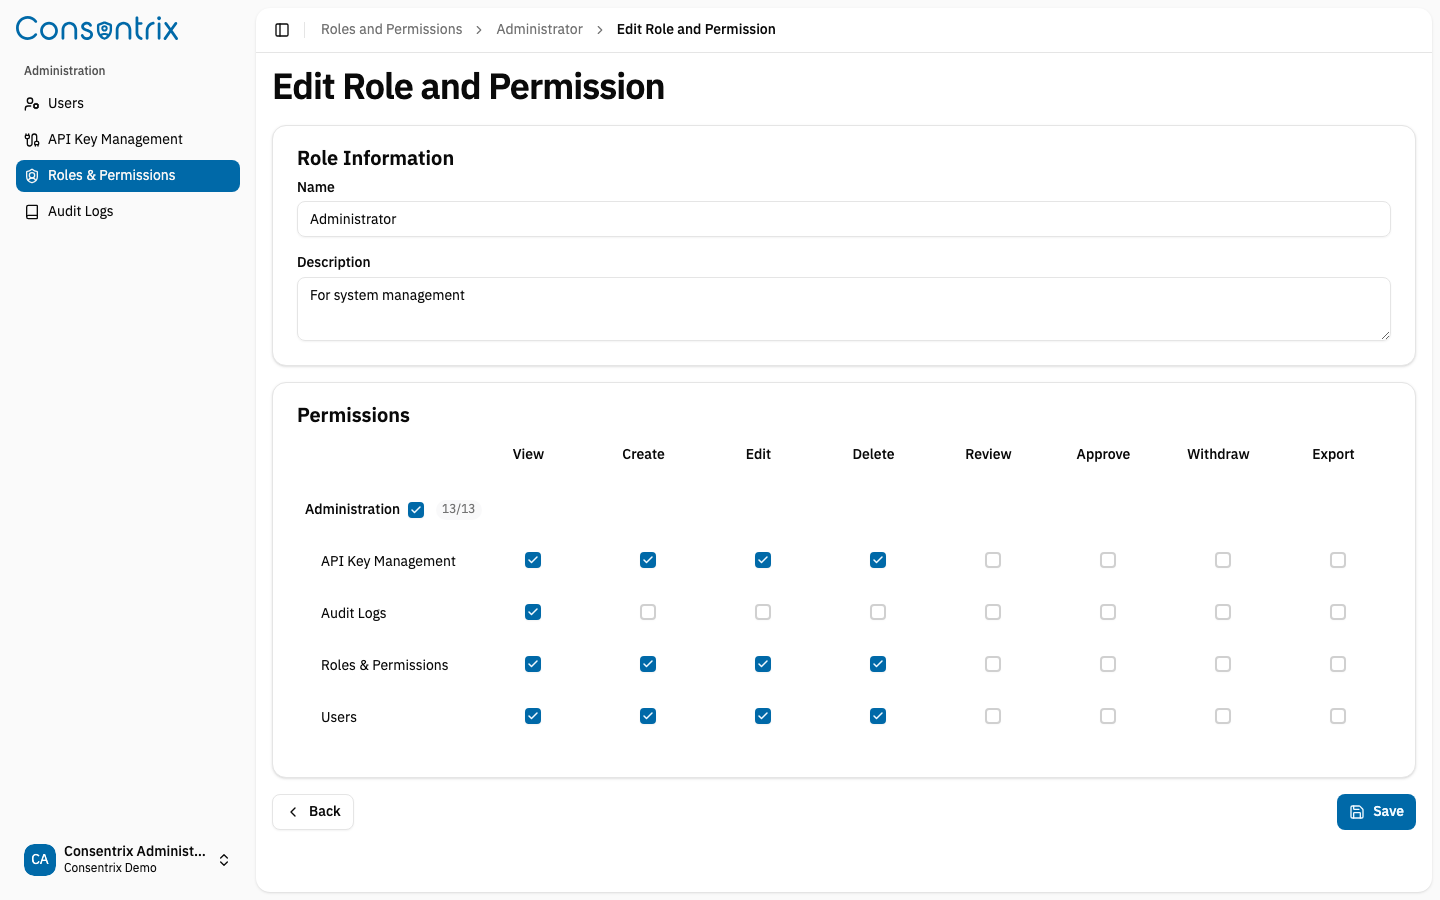
Note: Permission changes take effect immediately for all users with this role.
Delete a Role
Deleting a role removes it from the system and automatically removes it from all users who had it assigned.
Steps
- From the Role Detail page, click Delete Role.
- A confirmation dialog will appear warning that the role will be removed from all users.
- Click Confirm to delete the role.
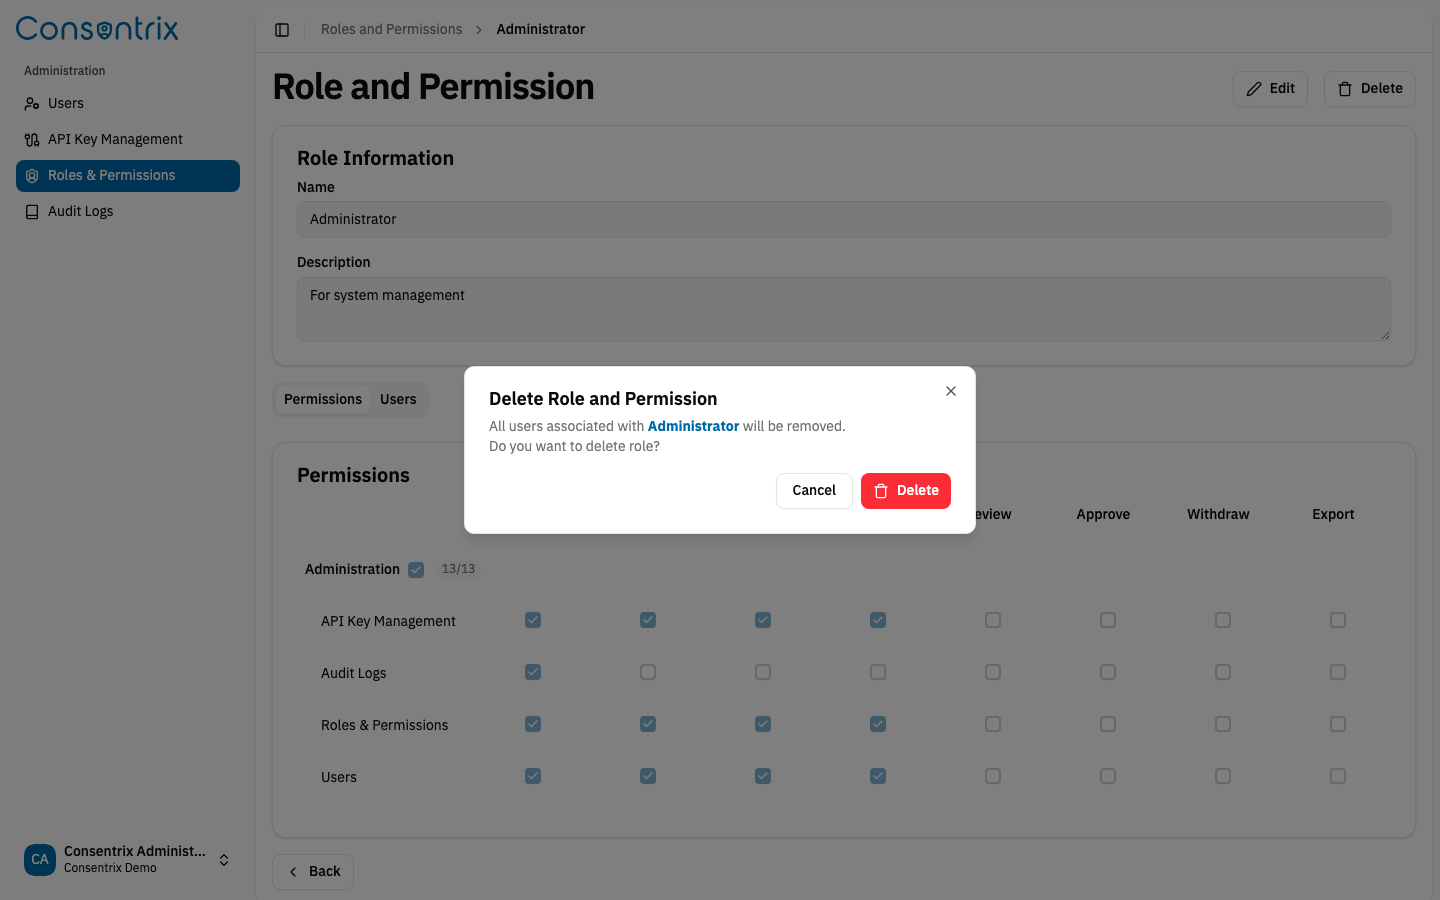
Warning: This action cannot be undone. Ensure no critical users depend on this role before deletion.
Search for Roles
You can filter the role list by name:
- In the search bar at the top of the Roles and Permissions page, enter part or all of a role name.
- The table will filter to show matching roles.
- Clear the search to view all roles.
Best Practices
Role Naming Conventions
Use clear, descriptive names that indicate the role's purpose:
| Good Examples | Avoid |
|---|---|
Customer Service Agent | Role 1 |
Content Editor | Editor |
Finance Admin | Admin |
Permission Assignment
- Principle of Least Privilege: Grant only the permissions necessary for the role's tasks.
- Group by Function: Create roles based on job functions (e.g., "Marketing Manager", "Support Agent").
- Document Roles: Use the description field to document the intended use of each role.
- Regular Reviews: Periodically review roles and remove unnecessary permissions.
User Management
- Assign Roles Carefully: Ensure users have appropriate roles for their responsibilities.
- Monitor Access: Use the Users tab to review who has access to sensitive roles.
- Remove Deprecated Roles: Delete roles that are no longer needed to reduce complexity.
Troubleshooting
"Create Role" button is not visible
- Your user account does not have the
roles_permissions:createpermission. Contact your administrator.
Cannot unlink a user from a role
- The user may have only one role assigned (cannot remove the last role).
- The user may be an IAM user (cannot modify IAM user roles).
- You may be trying to remove your own role (self-protection).
Permission dependencies auto-select other permissions
- This is expected behavior. Some permissions require other permissions to function correctly. The system automatically selects dependent permissions.
Related Links
- Role & Permission Guide — Manage roles in the portal
- User Management — Manage users and their role assignments
- API Key Management — Manage API key permissions
- Audit Log — Track role management activities